Alpine Climbing Packs

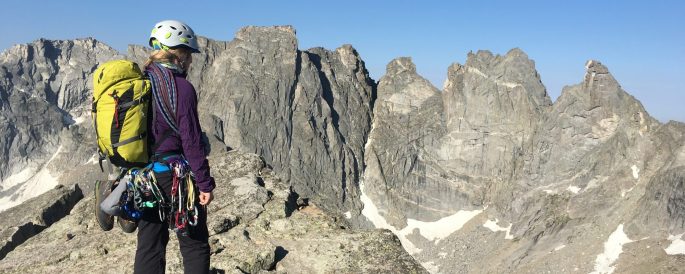
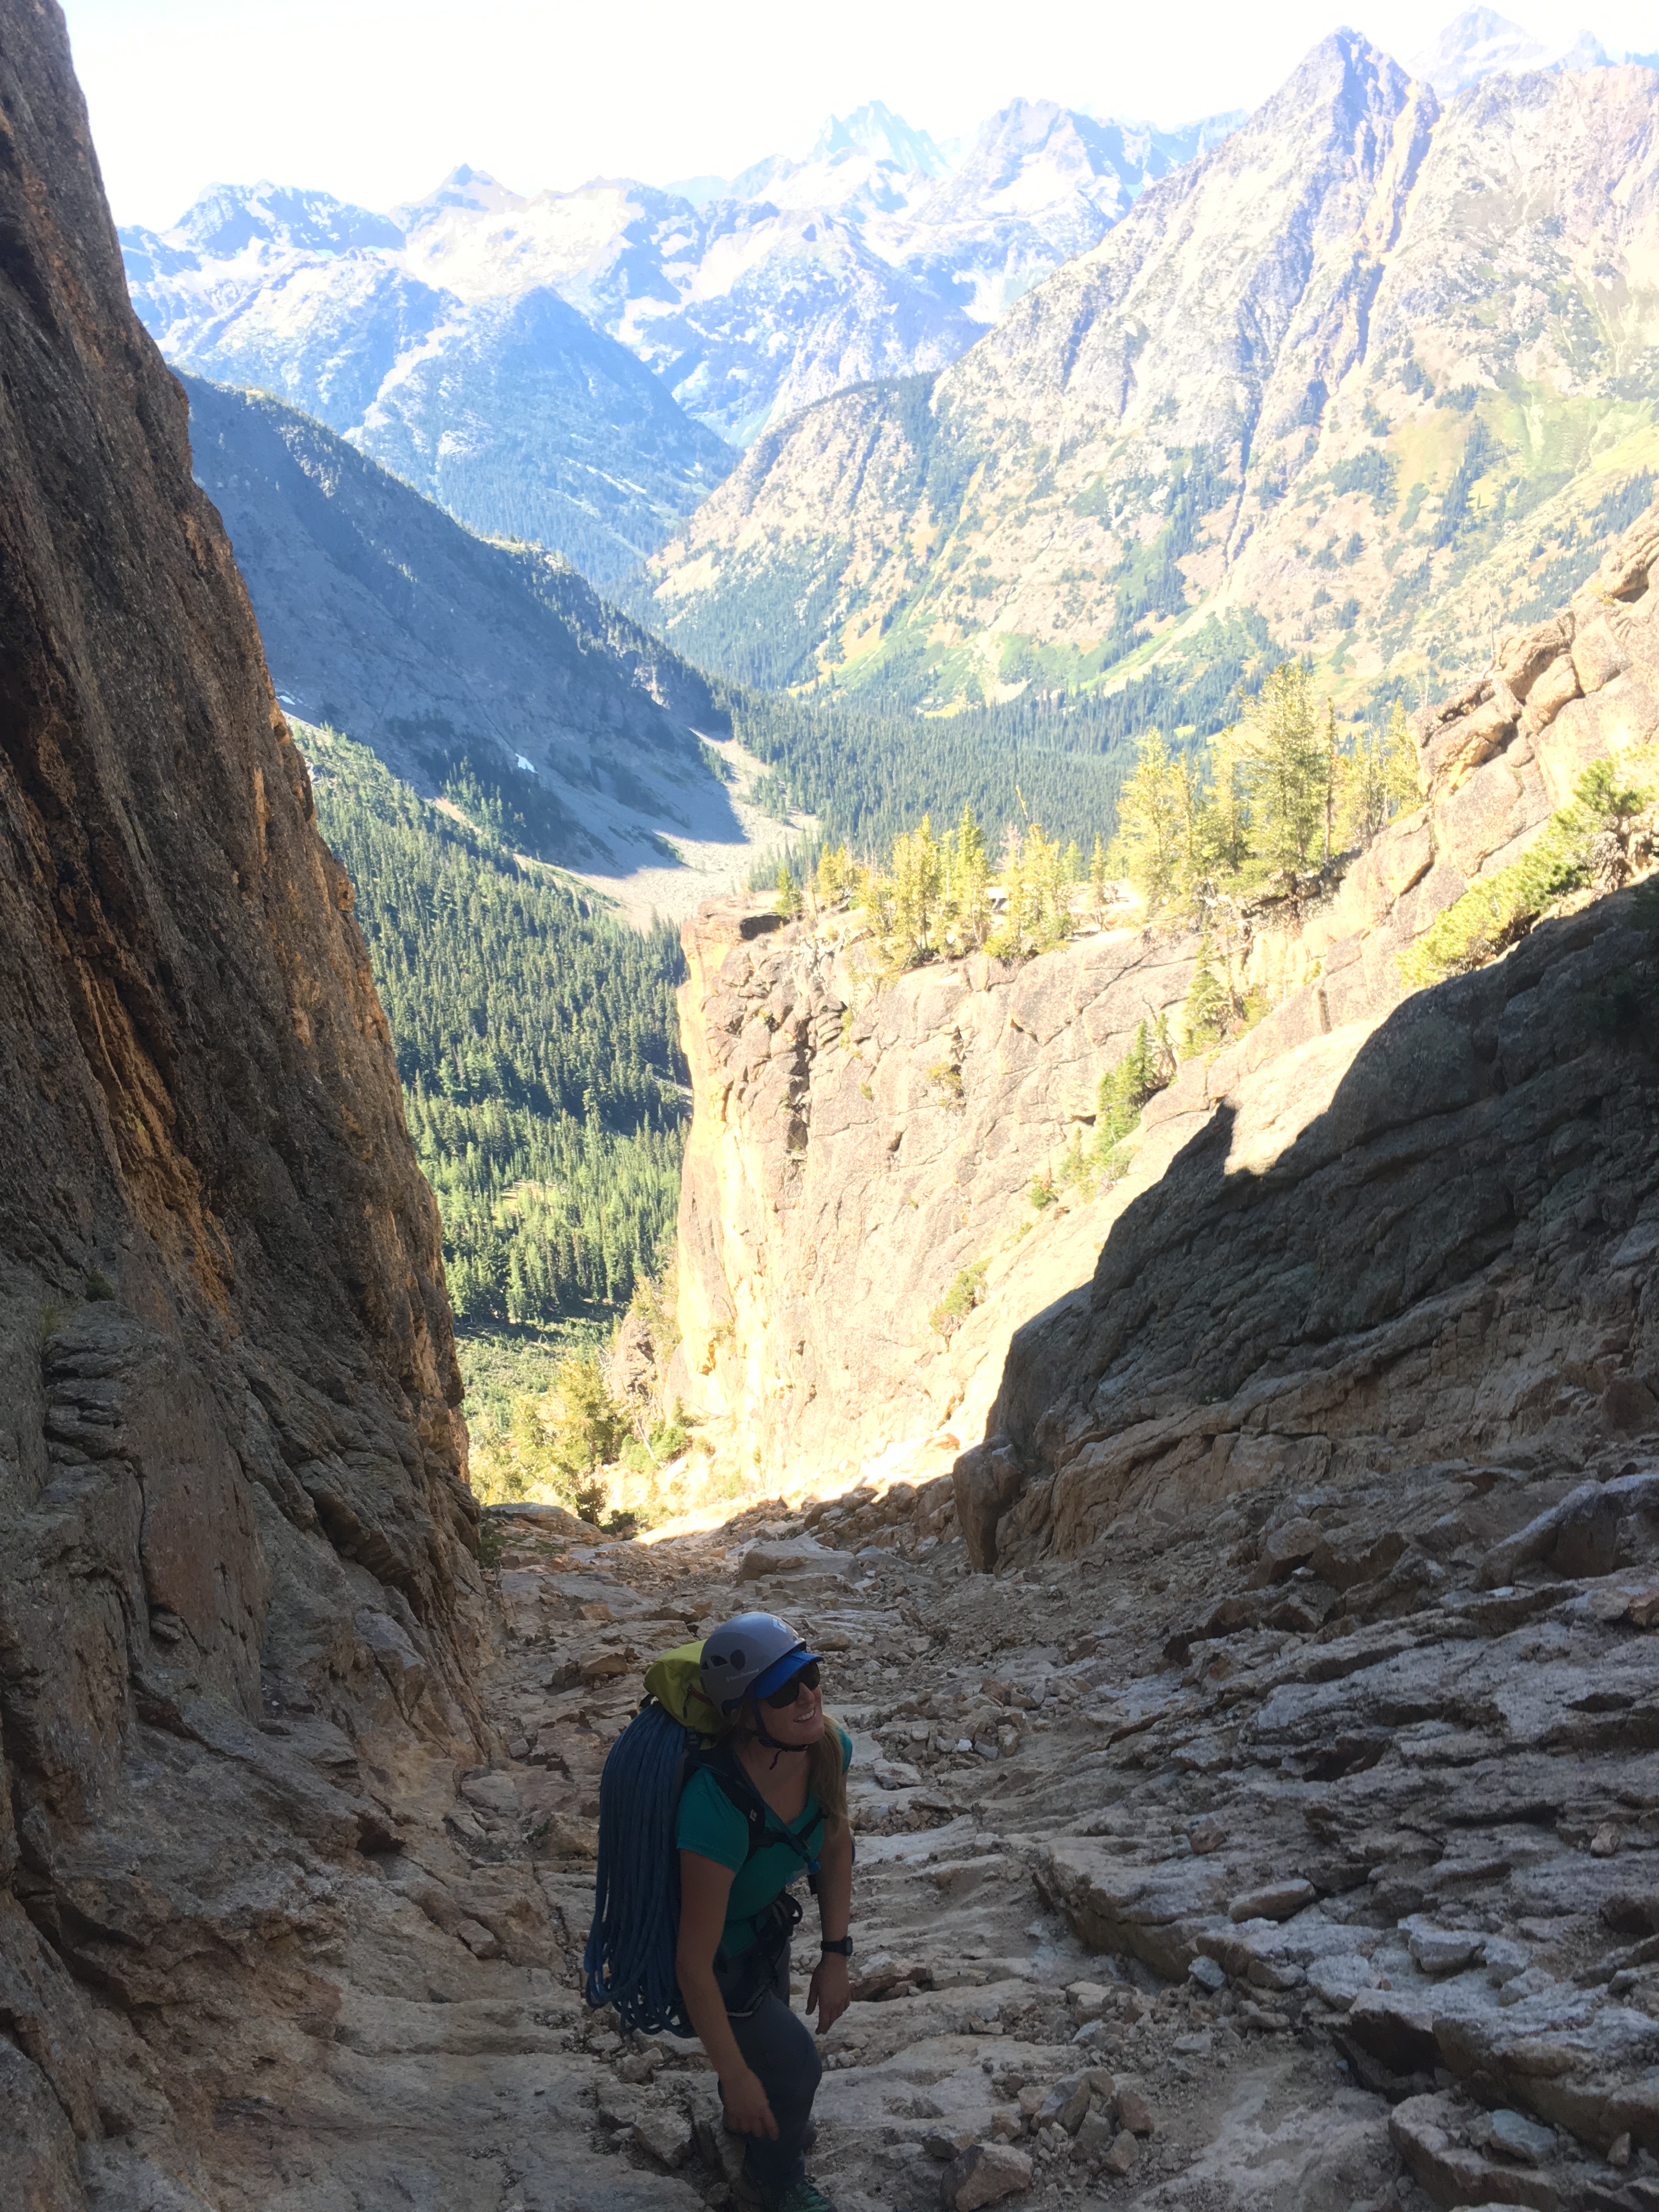
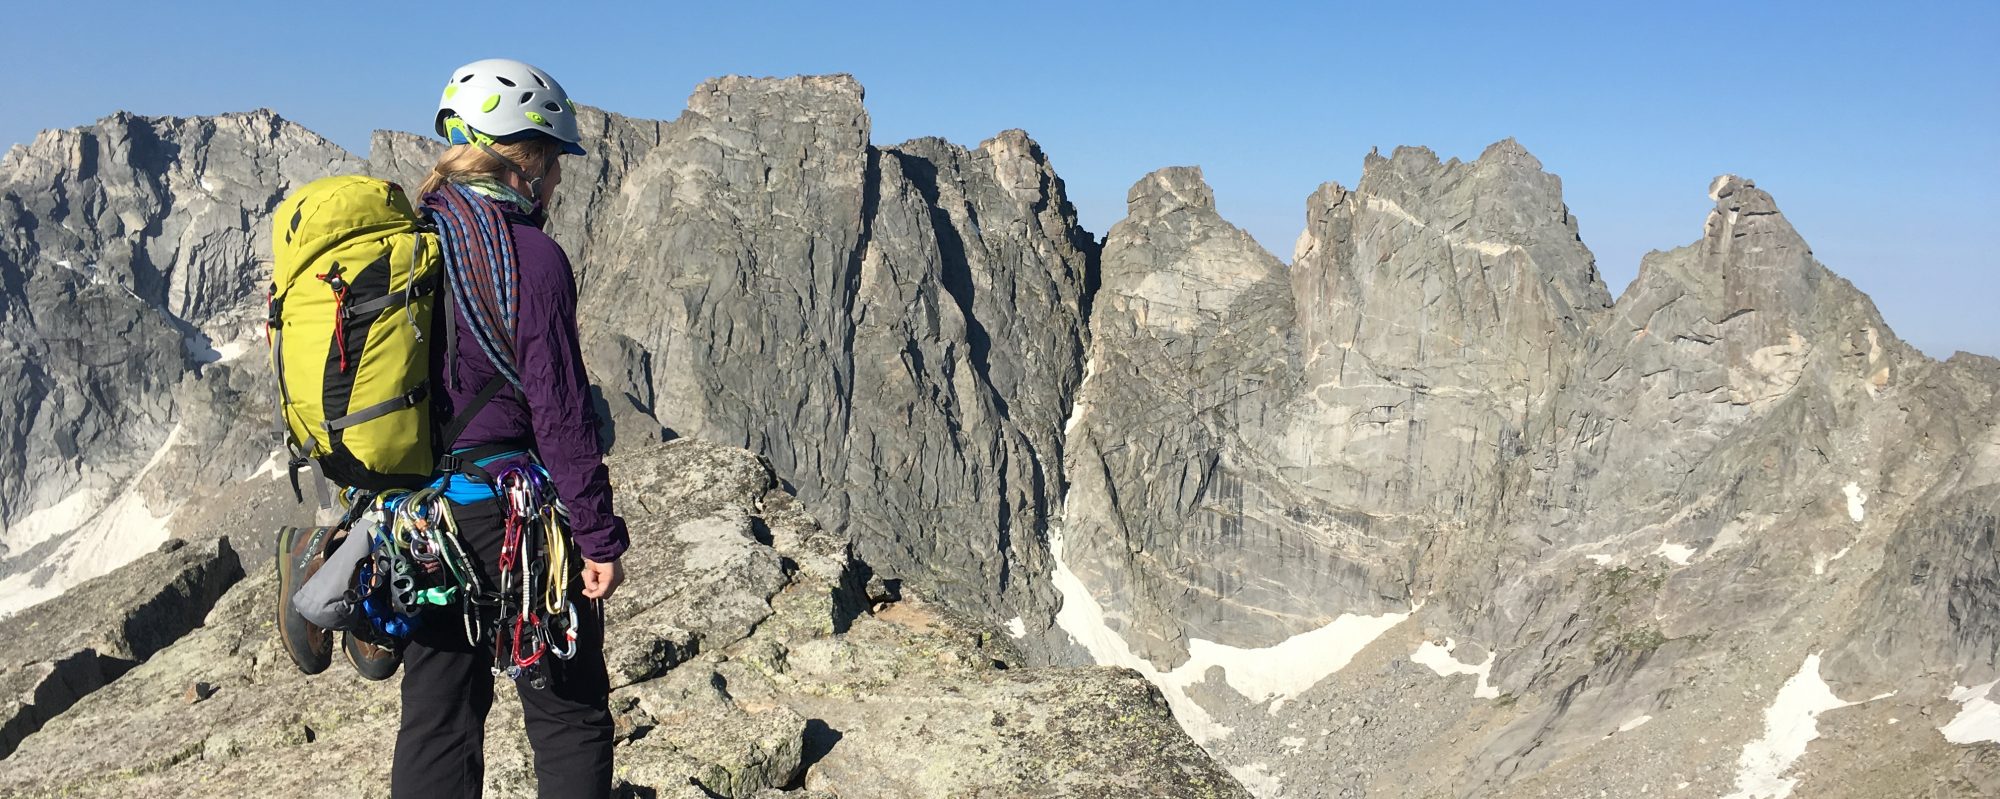
With the changing of the seasons I’ve been doing a lot of reflection. This summer, Rob and I spent a lot of time alpine climbing, which got me thinking about the gear I used – what worked, what didn’t, and why. The first piece of gear that came to mind is my Black Diamond Speed 22 pack! This pack makes me really happy when I’m using it – yes, I said that about a backpack. Hehe 😀 If a piece of gear can bring me this much joy, I guess it’s worth writing about! But first, let me start by defining what I mean by an “alpine climbing pack.” When I use this term I am referring to a pack worn when rock climbing in the alpine. Straight forward, right? This pack is for day missions that could be more committing, thus needs to be large enough to carrying all my extra layers, water, food, first aid, etc. as well as an ice axe and crampons if they are needed, yet it needs to be small enough so as not to interfere with my rock climbing performance. I think a pack in the 20-25L range for capacity is perfect – my pack is a size small/medium so it’s actually 20L. I’m also referring to a pack that can fit inside my overnight pack when I’m on a multi-day trip, as this is the system like to use – I prefer packs with solid hip belts for carrying heavy loads but these don’t climb well so I bring two packs. Unfortunately, since I have BD Speed 22 in size small/medium (I’m 5’1″ by the way), which they no longer make, once I wear it out I’m going to need to find something else. Ugh. Thus on top of talking about my favourite pack and why it’s my favourite, I thought this would be a good excuse to talk about these types of packs in general and take a look at the other options out there. Being a “petite alpinist” (haha that sounds funny 😜) however, I know finding something in the right size is going to be the biggest challenge, let alone have all the features I’m looking for.

So how do I pack for an alpine climb? Well, that’s a great question – I’m glad you asked! 😉

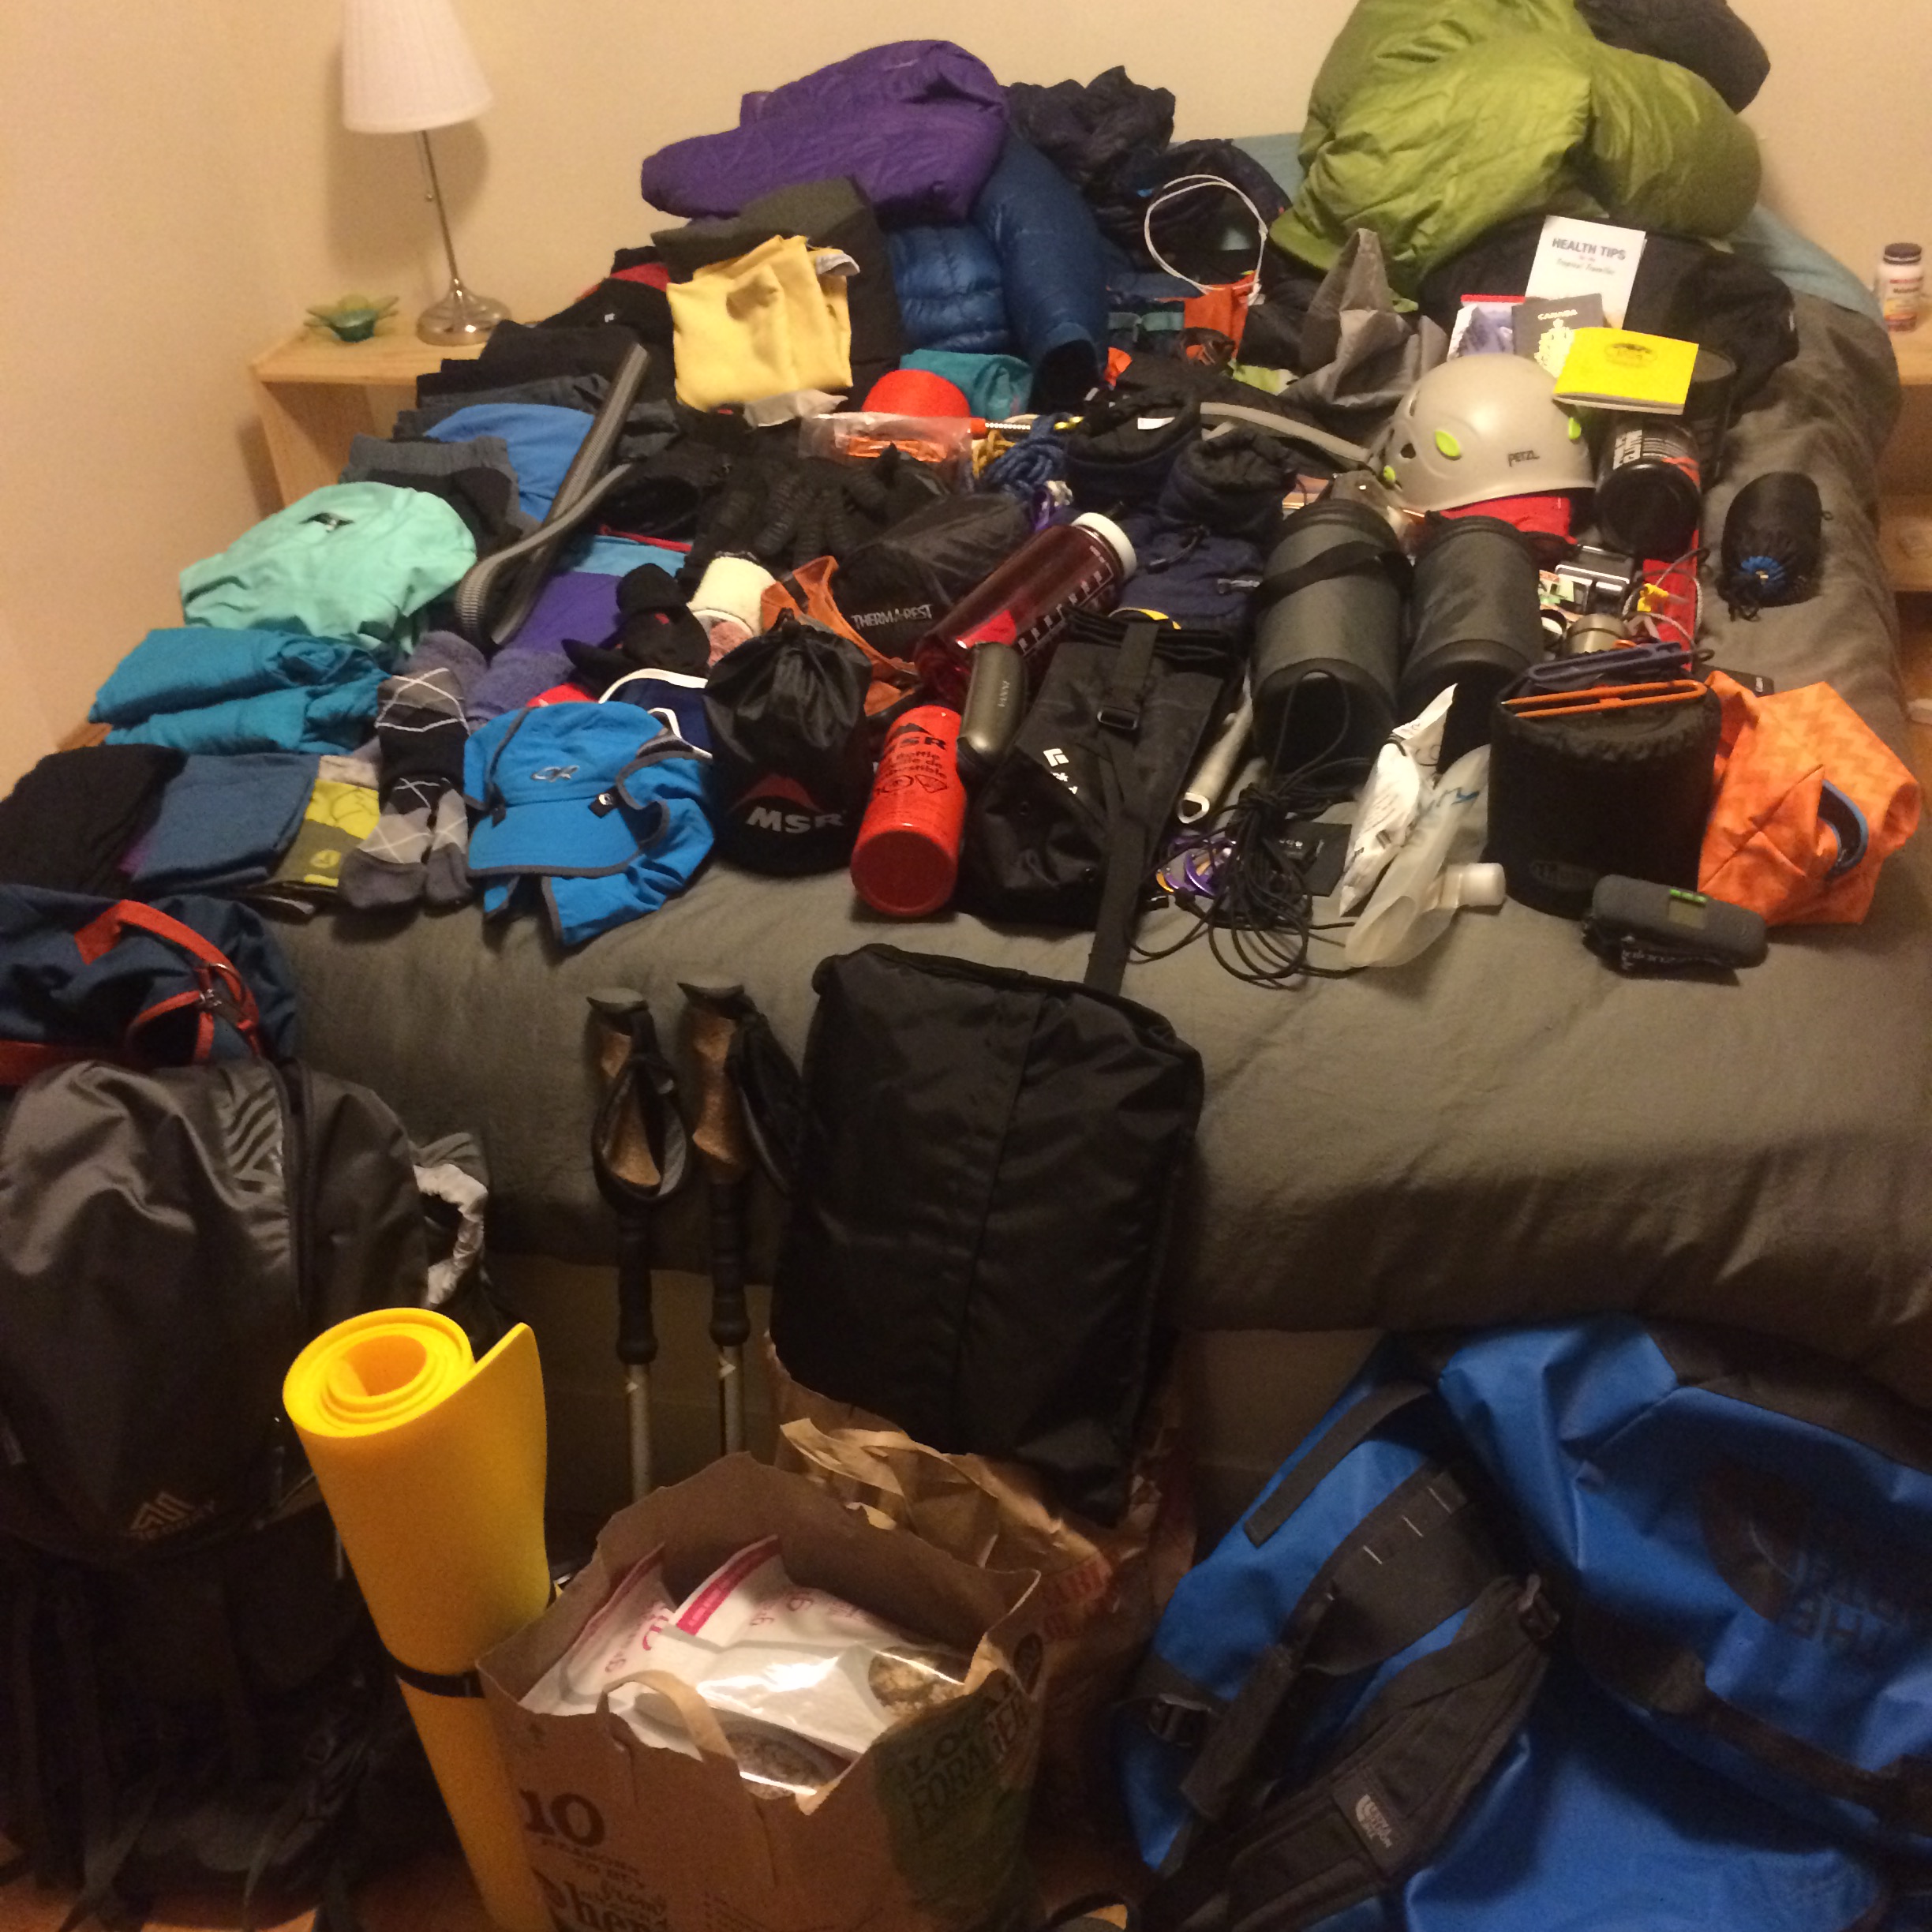
I’ll start by talking about what I pack and how I pack, so you can think about how it relates to your system and thus judge how relevant some of my comments are to you. I like having a combination of items in my pack as well as on my harness. This distributes the weight between my pack and harness – women have a lower centre of gravity so we’re designed more so to carry loads on our hips compared to men. This also means I can get by with a smaller capacity pack, which I find is better for rock climbing. With this in mind, I leave camp or the car with my harness on with my climbing gear and climbing shoes on my harness. I also prefer leaving like this so all I need to do when we get to a climb is flake the rope, have a quick snack, put on some sunscreen, and change my shoes. If I am on a more committing alpine route here is an example of what I’ll likely have inside my pack:

  • Waterproof jacket and pants
  • Small micro insulated jacket – this type of jacket is great when I need an insulating layer while climbing but don’t want to overheat. I can also clip it to my harness.
  • Medium insulated jacket – when paired with the above jacket is good if we are benighted.
  • I may have another thin long-sleeve layer in there, it depends on the weather that day – I could be wearing it instead (I always wear at least a pair of climbing pants and a t-shirt while climbing)
  • Merino toque – that fits well under my helmet
  • A buff
  • Sun hat
  • Gloves – sometimes a second pair if I think they’ll get wet
  • SOL bivy
  • First aid kit
  • Personal locator beacon
  • 2L water bladder with water 🙂
  • Lots of food
  • Sunglasses with a case
  • Headlamp
  • Spare batteries
  • Small container of sunscreen and SPF lip balm
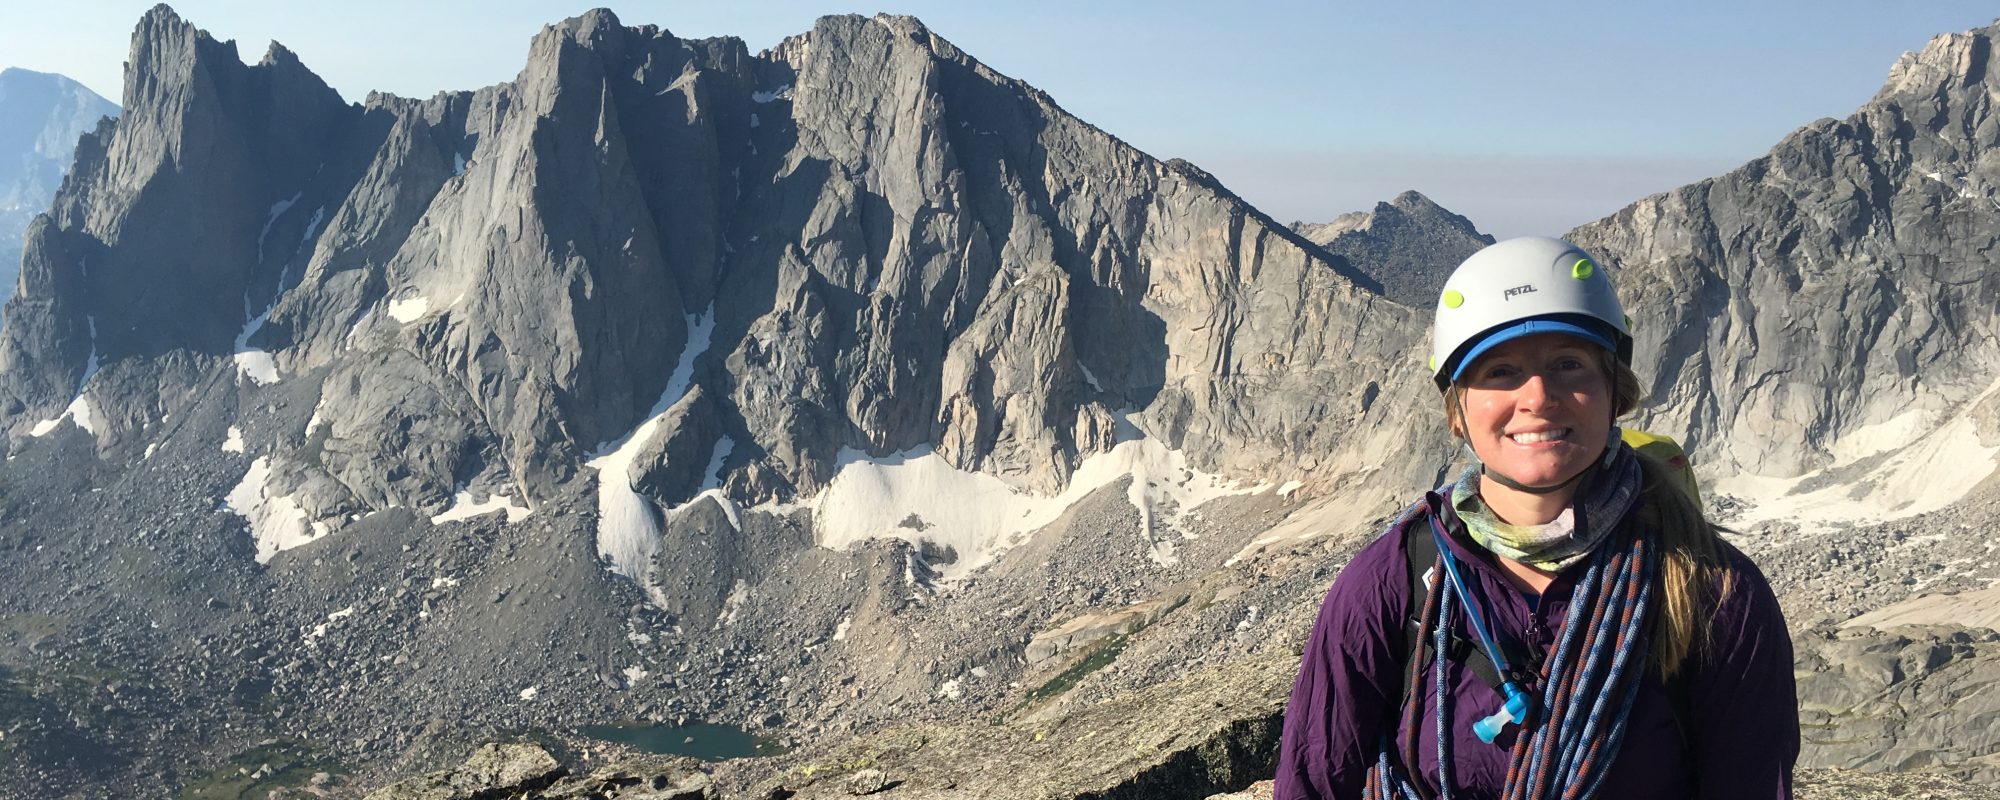
  • Helmet
  • Rope – coiled and strapped under the lid for the approach
  • Crampons (if necessary)
  • Ice axe (if necessary)
  • Note: I have been able to fit my mountaineering boots (LaSportiva Trangos size 37.5) inside my pack during a climb if needed but for many people this may be difficult with 20L. I think for people with larger feet 25-30L be better.

I think that’s everything!

img_4337
On the approach for Liberty Bell, Washington Pass. Coiled the rope a little too long…
cropped-img_5158.jpg
Putting the BD Speed 22 to good use. On the summit of Pingora, Cirque of the Towers.
img_4013
Rappelling from Pigeon Spire. My boots are actually in my pack in this picture, but I left my ice axe and crampons at the start of the technical rock climbing; The day started out really cold so I felt I needed to bring my boots on the climb just in case.

Alright, let’s break down the important features of an alpine climbing pack.

Features of the BD Speed 22 that I like and use as a benchmark for other packs:

  • A strap under the lid to attach a coiled rope – adds stability/security.
  • Top-loading – I’ve seen some designs that still have a strap to hold a rope even though they don’t have a lid, and they seem to work well but I find I prefer the lid because it’s usually bigger than any external pockets on those other packs. The lid of the BD Speed 22 is large enough to fit all the things I need easy access to regularly.
  • A floating lid that can be adjusted in the front and back – a long front attachment means the lid won’t flap around when the bag isn’t full and adjustable back straps are great for giving more space when the pack is full but you still need to attach the rope.
  • Under the lid storage pocket is nice.
  • Capacity of 20L – I think this is the perfect capacity but for taller individuals a 25-30L pack might be necessary. Rob, who is 5’9″, uses a 30L pack but there is always extra space in his pack.
  • Smaller size – The S/M fits me perfectly – the shoulder straps aren’t pulled all the way down, there isn’t lots of extra webbing dangling when I do up all the straps, and even when full, the pack is still high enough above my harness/chalk bag that I can chalk up just as a would if I wasn’t wearing this pack (I find with packs that don’t fit I have to push it out-of-the-way when I want to chalk up). The streamlined design helps in this regard as well.
  • Two ice axe holders
  • Compression straps – great to eliminate extra space when the pack isn’t full and to still provide support to a rope if carrying a rope on the outside and the pack isn’t full.
  • 2L water bladder sleeve
  • Durable shoulder straps – I find the mesh kind are not strong enough.
  • The shoulder straps are positioned high enough/the lid is low profile so that when I look up the pack isn’t in the way.
  • Only webbing for the “hip belt
  • A somewhat stiff back panel for support when the pack is full and so the bag won’t buckle when not full (though the buckle usually only happens when a bag doesn’t fit).
  • This pack is made out of a durable nylon material, so the focus is on the durability rather than being lightweight, which I prefer.
  • A durable handle so I can dangle the pack from my belay loop while in a chimney and know it won’t break.

So my online research on other alpine climbing packs turned up lots of great packs but only one in the <30L capacity range that came in a size “short” – all other packs came in only one size (which has always meant they won’t fit)! This pack was the Ortovox Trad 24 S. There’s no size chart associated with this pack however, so I’m assuming that since it is labelled as a “short” version that it would work for me. In general, it was difficult to find torso length ranges for these packs that only come in one size – they were often not listed on the size charts. In any case, here are some packs that I think are still worth checking out for those of you who are not as vertically challenged as I am. 🙂 These packs don’t necessarily have all the features I mentioned above and I haven’t checked them out in person, but I think they still have a lot of the really important features and are worth considering:

  1. Arc’teryx Cierzo 18 or Arc’teryx Cierzo 28
  2. Black Diamond Speed 22
  3. Gregory Verte 25
  4. Patagonia Ascensionist Pack 25L
  5. Marmot Ultra Kompressor
  6. Vaude Scopi LW 22

While I was trying to find the torso length ranges for these packs I was going a little cross-eyed, so I opened up Excel…😜 haha! For your reference:

screen-shot-2016-09-20-at-9-00-24-am

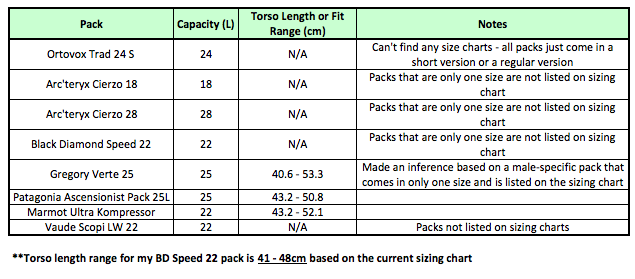
Although, in theory, the torso length range of some of these packs does overlap with the range of my current pack, I’m not too optimistic it would work since it hasn’t before. Next step would be to actually measure my torso, measure the packs, and try them all on in person…haha! Perhaps another time. 🙂 For now, hopefully this post just gives you some food for thought.

I think I’ve rambled for long enough! What’s your favourite alpine climbing pack and why? Add a comment below!

And don’t forget to…

Keep on rockin’ 🗻

J.

Expedition Planning – Where to start?

Believe or not, I love planning for adventures and doing so is a strength of mine, thus I’d like to share with you some strategies for expedition planning that have worked for me. Expedition planning is especially fun – it’s like one big project. 🙂 I love how there’s lots of moving parts. However because of all these moving parts, I think it’s best to divide the planning up into more manageable sections. Since there are a lot of decisions to make that will often depend on each other, having a timeline with deadlines for making these decisions will help. Like a Gantt chart, you know!? JOKING! Or am I…😉 One thing you’ll probably run into is that lots of items will need to be discussed numerous times before a decision is made, and even once a decision is made it may need to be changed. Patience and flexibility are key, but try to have quality discussions about these subjects and know what those hard deadlines for decision-making are to limit the wishy-washiness.

As I write this, I have completed one expedition (to Aconcagua) to date. We were an unguided, self-propelled team, thus I am also writing this from the perspective. I think a lot of the information below will be the same regardless of whether a climb is unguided or not, but I just wanted to give you the context.

img_3242
Doing a pre-packing session with all my gear for Aconcagua. Wowzers! That’s a lot of gear…

Here are some steps to consider when planning an expedition:

  1. Preliminary research: This will be research that is detailed enough to decide whether or not this is an expedition you are interested in pursuing and capable of completing by whatever dates you’re thinking about. The extent of the research required in this phase will be different for everyone, but I recommend reading a guidebook first, looking at a map, and then supplementing this foundation of knowledge with online research and meetings with people who have done the trip before if possible. When preparing for our Aconcagua trip, I was surprised just how much more information we learned from talking to people who had been there before compared to if we only read the guidebooks and online information (even if you don’t know anyone who has done the climb before, there are people online that you could reach out to 😉). I think getting a sense for the time required to complete the climb, a rough timeline of key “to do’s” leading up to the climb, what gear/skills/training are required and how long will is take to be prepared in that regard, who your teammates could be, and an estimate of costs are useful. I’d start this research well in advance of the trip – the amount of time needed to prepare for something like this will vary for everyone but I’d estimate 6 months to a year.
  2. Team formation: This should begin after some preliminary research is completed and you have a goal/purpose in mind. Most expeditions are completed in a team, thus you need to know the minimum/maximum number of people the expedition requires and start to think of who those people could be. It’s best to hold some in-person meetings and complete some climbs together (if you haven’t climbed with a person before or if you haven’t done this type of climb/trip with a person before). By doing this you’ll have a chance to discuss goals and expectations, get a sense for whether or not you could rely on/trust each other, what everyone’s skills/experience are, how well everyone will get along/what some potential challenges may be (though the reality is that you won’t be able to figure all of these challenges ahead of time), and determine everyone’s availability/flexibility with the dates for the expedition.
  3. Detailed route/logistics planning and defining roles: These questions include: Which route do you want to take up the mountain? What’s your plan B and C? Are there permits or other park restrictions/considerations? What might the conditions/weather be like? Are you flying to a foreign country? Do you need a special visa to enter this country? How will you get around when you get to that country? What happens in case of an emergency? How much fuel for your stove will you need? Do you need any inoculations or prescription medications before you go? Who will you purchase your travel and medical insurance from? What does that insurance cover? NOTE: Not all travel medical insurance covers mountain climbing. There are LOTS of questions to consider under detailed route/logistics planning. Once you know who your team will be, more detailed planning will need to be divided among the members and roles defined. These roles could include: treasurer, transportation specialist, gear specialist, weather and conditions specialist, logistics specialist, food planner, health and safety specialist, etc. 🙂 The list could go on and you could think of it in terms of planning roles vs. trip roles as well. I recommend platforms such a Google Drive/Docs/Sheets/Calendar to keep track of everything, as it will be easily accessible in one place by everyone. Holding regular or semi-regular meetings either in-person or via a platform like Google Hangouts (That’s a lot of promotion for Google! 😬) will help the team stay on track with planning and training. For our Aconcagua trip we met monthly, then bi-weekly, and then weekly as the expedition grew closer. We always had a standing meeting day and time, thus it was understood we were always expected to meet at that time unless one of us noted that we needed to change it. We had meeting agendas, kept meeting minutes, and had action items at the end of each meeting that were brought forward as part of the agenda for the following meeting.
  4. Training plan and climbing objectives: Creating some sort of individual/group training plan and group climbing objectives to complete before the trip will go a long way to ensuring your team is ready for the expedition. You may need to carry heavy loads on back-to-back days, at altitude, in bad weather – woot woot! Haha! Training on and off the mountain can help with this. These pre-trip climbing objectives will help you learn how your teammates deal with stress, hunger, tiredness, bad weather, etc., as well as how you deal with these situations if you don’t already know. You’ll also begin to learn how this plays into the whole team dynamic on the mountain – will you be able to tolerate each other and work together, or are there going to be too many problems. You won’t be able to anticipate everything, but this deserves some thought because travelling in the mountains is serious business – not the place for too much conflict or drama.
  5. Skills training: Study the route and do some scenario planning with your team. If you or any of your teammates don’t currently have all the skills required to complete this trip (pre-trip climbing objectives can also help determine this), consider how are you are going to gain those skills, and are you going to be able to gain them in time for the trip. This could mean the goals of the trip or the planned routes may need to be revisited.
  6. Gear: I debated whether or not to add gear to this list, thinking it could fall under number 3 for the purposes of this post, but I think gear is an important consideration and could determine whether or not you go, so I added it as a separate point. What gear is needed to complete this climb? What is shared gear vs. individual gear? Do you have this gear? If not, how are you going to get it? How heavy might your pack be on any given day and can you carry this over the estimated distance/elevation gain? The gear aspect needs a lot of attention to ensure your safety and it can factor into the cost, so take the time to figure this out. I also strongly recommend doing a pre-pack with your gear well in advance of your trip to ensure you have the capacity to take all the gear with you, as well as to get an idea of the weight and dimensions of your luggage, which will come in handy. NOTE: I was also debating whether or not to add food as a separate category as well but I have decided not to. We need to eat, that is a given, and although it is important to make sure we bring enough calories of tasty food, people may or may not spend too much time on this before leaving for a trip. We did spend some time making food lists prior to our trip and we brought a lot of freeze-dried food with us because we could, but compared to the other aspects of the planning process we didn’t spend as much time on this. That was the case for us at least. 🙂
  7. Budgeting and finances: I added this as a separate point because I think many people may not create a budget or track expenses for an expedition, but I encourage you to do so! Most of us don’t simply have money we can just throw at an expedition, so knowing roughly what to expect the costs to be and then what they actually end up being will help you think through what you truly need. If you take the time to figure this out, there are often ways to reduce the costs of an expedition (rent or borrow gear vs. buying it, include more stopovers to reduce flight cost, stay in a hostel instead of a hotel, take the bus instead of a taxi, etc.). Another thing people do is use their climb as a means of raising awareness or supporting a cause, which is great but make sure you sufficiently dedicate the time and resources to do this properly. This could include writing funding proposals, holding special fundraising events, becoming engaged online to promote the cause and your trip, and so on. Give sufficient thought as to how you’re giving back if this is what you want to do.
  8. “Visualize” the days pre-climb, on the climb, and post-climb: I found this to be an extremely valuable exercise. For our Aconcagua trip we “walked through” each day on our trip – where would we be, what it might be like, what we would need/what we would need to do, and what we thought we could realistically accomplish each day, etc. We wrote this out in a detailed itinerary that was from the time we left Vancouver to the time we returned to Vancouver, and then from that we created an abbreviated version. For example, from the detailed itinerary we teased out just the climbing information: rest days, cache and carry days, moving camp days, distance covered, starting/ending/sleeping elevation, elevation gain, approximate hours of hiking, etc., which we could use on the mountain itself.

So there you have it! I’m sure there are things I have missed, but my goal was to give you something to think about. In the Aconcagua section of my site I will explain these points in more detail as they related to that trip. Obviously, there is no way to plan for everything and those unexpected moments are all part of the experience as well, but I think there is a lot you can do beforehand to reduce stress, increase safety, and help you get the most out of your trip.

Where’s your next trip? Comment below!

Keep on rockin’ 🗻

J.